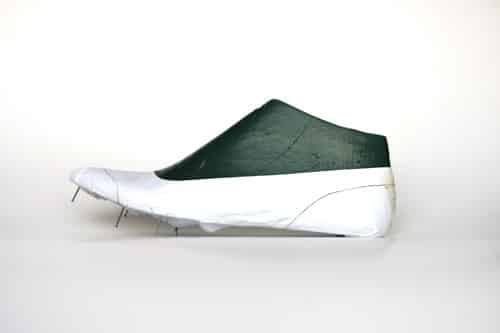
How to make shoes working with paper patterns and save your money on leather is the topic of this post.
Navigating the realm of shoemaking can be both thrilling and costly, especially when premium materials like leather are involved. This post delves into the art of crafting shoes using paper patterns, an economical and effective approach that allows for experimentation without wasting precious leather. By mastering this technique, not only can you refine your designs, but also ensure precision and minimize resource wastage. Perfect for both beginners and seasoned shoemakers, this method paves the way for creativity without breaking the bank. Dive in to discover the steps and tips to make the most of paper patterns in your shoemaking journey.
When you work on a new shoe, before you make the actual shoe, you must check it. It doesn't matter if you are a master shoemaker or a beginner, you must check if your shoe pattern is correct to not fall flat on your face. Although it's more common to make the shoe pattern check from leather, I strongly recommend to work with ordinary paper.
This is how I work and how I make my shoes, and this is how I teach it in all my shoemaking courses of the 1 Year Program.
Why? It will cut your work time, it will save your money and actually, it will be more accurate.
How to make shoes using paper pattern
Now, on the example of simple flat ballet shoes I will explain you how to make shoes using the paper, the ordinary paper A4.
Here is how I make simple flat ballet shoes:

1. This is the cardboard basic pattern of flat ballet shoes, which you need to check

2. Here is the exact copy of the cardboard basic pattern with all its lines from the ordinary A4 paper.

3. To make the paper pattern more flexible just crumpled it a little bit. This way it will be possible to last it on the last. Here is important not to overdo it, or it will tear up.

4. Here is the paper pattern lasted on the last. You see, it looks exactly like leather upper lasted on the last. This way you can easily check your pattern that is made from paper. This is how it must be done in shoemaking working with paper.
5. Observing how your paper pattern lays on the last you can easily understand if you need to make some corrections or not. Then you will make all those corrections on your original cardboard basic pattern.
The shoe pattern making is only the first stepof shoe making and if you want to learn all other steps,you can read this post: "Beginners in Shoemaking Tools and Materials Definitive Guide 2023" or for full list of shoemaking tutorials about shoe pattern making, please visit this directory: "Shoe pattern and templates".
Now, to explain to you better I made for you a shoe making tutorial on how to check your basic pattern using an ordinary paper A4. Watch the video that is at the beginning of this article and share this shoemaking tutorial if it was useful for your shoemaking craft.

I think solution B. Do not need original cardboard.
Hi Sveta, Thanks for making me think about how one would correct Dan’s problem… it’s good practice. I think I know the reason why the pattern is not fitting correctly. If I am correct, the original cardboard wont be needed for the solution and he can work from his paper pattern, but I will have to wait for your answer to check my thoughts.
Hi . Yes you are both right. We can work with the paper pattern, that is why it is so important to make our check with paper pattern. And I will show my solution to Dan problem too. Thank you for your comment.
yes i’ll always use papper patern
As usual, a useful video. Thanks Sveta. Obviously, or presumably, most of US MORTALS do not get the paper pattern perfect the first time. I know I don’t :(( One of your full videos (ballet pumps?) shows how to correct loose sides on the paper pattern. Do you plan to follow today’s video with an explainer of how to correct various imperfections in the paper pattern? I know that feeling when a paper pattern fits PERFECTLY (I experienced it ONCE), but often my attempts to correct errors simply lead to bigger errors, or to the error moving to another part of the last/pattern. Many thanks.
Thank you, Sveta. I was using felt, but this so much easier and cheaper. Looking forward to using it on my next pair of shoes.
That is great.
Great post.Thank you for sharing the blog. Things are very cheaper.Looking forward to see more post.
So enjoyed this tutorial. Happy I came across your website and can’t wait to learn more. Thank you!
Thank you for your comment.