Making Flat Ballet shoes as your first-ever footwear type will make your learning of shoemaking easier and smoother!
Yes, I know, there are a lot of footwear types that you would want to make but, as a beginner in shoemaking, I advise you to start your journey with this shoe type.
I already explained to you about it in this post ‘’Making Shoes For The First Time? Do This!’’, so make sure to check it, if you missed it.
Now, based on my student’s work through the years of teaching shoemaking,
I know that many of you want to make flat ballet shoes, only.
The reason is very clear with these footwear types you can create a wide range of shoe designs.
That’s why especially for you, the ballet lovers, I created a Flat Ballet Shoes Program, where you will learn how to make unlimited designs of flat ballet shoes, starting from the classic flats and finishing with your own shoe designs!
Now, In this post, I want to show you a few most important things about making flat ballet shoes that you should know before you dive in and start your shoe-making learning!
The Neckline is One of The Most Important Details in Making Flat Ballets
Classic flat ballets have a pure and clean design. That’s why the neckline (the topline) in making classic flat ballet shoes is such an important detail.
It is the main design element that can emphasize the beauty of your feet or in the opposite, can make it look worse.

Two Important Things To Always make Beautiful Neckline in Ballet’s shoes
In making flat ballet shoes there are two prime things that you need to know to always make a beautiful topline: the shoe’s last shape and your feet.
Shoe last shape in making flat ballet shoes

There is a special shoe type you need to use in making flat ballets.
It is pump last with low heels. The heel height is from 5mm up to 2.5 cm.
So the pump last with low heels is the shoe last for flat ballet shoes.
There are flat ballet shoes with many different toe shapes and wedge shapes, that can be flat or curved (depending on the heel height).
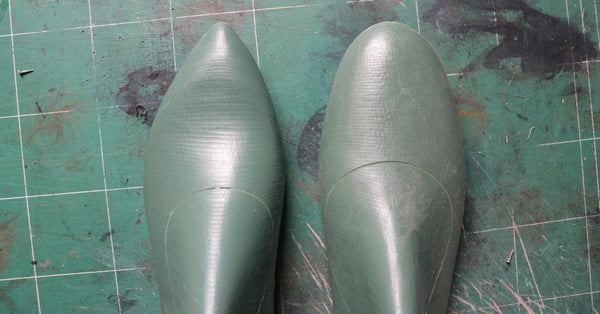
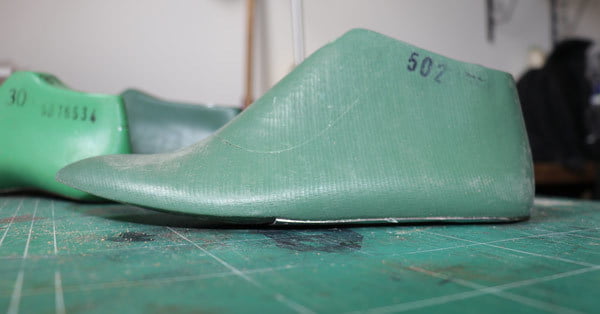
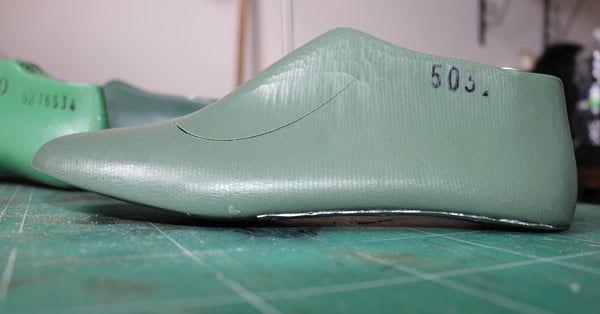
So if you will follow the shape of your shoe last and will design the throatline accordingly you will get the ultimate top line of your flat ballet shoes.
You will get a beautiful neckline that will emphasize the beauty of your shoe lasts shape.
Let’s compare these two examples of the necklines on the different shoe lasts.


In both examples, the red line follows the bottom edge of each shoe last and goes parallel to it.
The neckline at the pointed-toe shoe last is higher and narrower than at the rounded-toe shoe last. That is why by following parallel to this shape the neckline here is higher than at the second shoe last.
To follow the shoe’s last shape in the making of the flat ballets’ top line is not a strict rule (you can design different necklines), but by using this approach you will have the perfect throat line at your ballet flats.
During the design of the neckline, there is another important thing you need to take in your attention. It is your feet’ dimension and shape.
Your feet shape in making flat ballet shoes
Now I have a few questions for you.
Do you adore the look of your feet when they look like fall off from your flat ballet shoes?
If you have long and narrow feet would you be glad to reduce them visually?
Do you know how much can you go down in the neckline, in the throatline opening?

In the footwear as in the cloth, there are certain designs that will suit you better, which will accent the beauty of your feet much more than some other shoe designs.
So, yes, there is a certain measurement you need to use in the opening of the throatline. It must not be too opened to not show your toes and must not be too close, because it will hurt your feet.
You need to measure it from the heel toward the toe of the shoe last
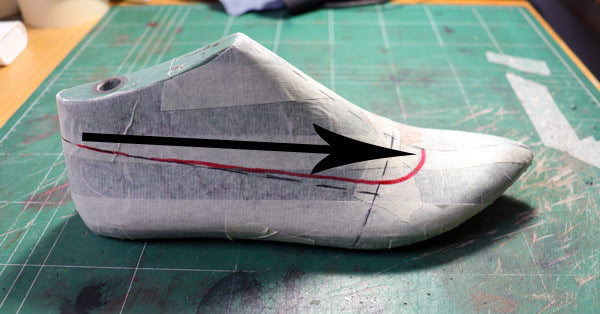
In addition, in making your flat ballet shoes you need to consider the shape and the size of your feet.
You need to design a neckline that will suit your feet configuration, meaning, if you have wide and full feet I advise you to not design a deep throatline because it will look bad.
On the other side, if you have long and thin feet, you can reduce visually the length of your feet by designing the deep neckline and sideline of your flat ballets.
These are only two examples of how you can customize the design of your classic flat ballet shoes according to the shape of your feet. There are many more options depending on the configuration of your feet.
So to design a beautiful and comfortable neckline in making flat ballet shoes you need to consider the shoe’s last shape and foot shape
Make a variety of flat ballet shoe designs working with different materials
The first option to make a variety of flat ballet shoe designs is to use different materials
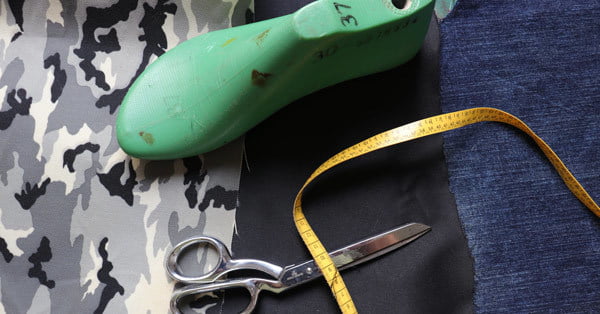
There are many different materials you can work with but the most accessible you can find no matter where you live, is a fabric.
There is a special fabric made for footwear but you can use almost anyone you like.
The important thing here is to reinforce the fabric to use it in shoemaking. You don’t need any special material, there is a special approach and I teach it in my program.
The next super important thing you need to know is how to adjust the pattern of your flat ballets to each fabric you will want to use in making flat ballet shoes.
In my Flat Ballet Shoemaking Program, you will learn this very clever and useful approach and many others that will help you to expand your design possibility in making flat ballet shoes.
So, let’s learn about another two approaches.
Two Approaches to Making Unlimited Designs of Flat Ballet Shoes
Together with using different materials in making your flat ballets, there are two shoemaking approaches that will help you to make unlimited shoe designs.
Inside the Boundaries of the Classic Flat Ballet Shoes
This is your classic, simple flat ballet design.

The red line is the boundary of this classic shoe design. Working only inside these boundaries you can make different designs of flat ballet shoes.
Once you make the pattern of these classic shoes, use this pattern to create other shoe designs working inside the boundaries of this pattern.
You will learn this approach in one of the courses of the Flat Ballet Shoes Program.
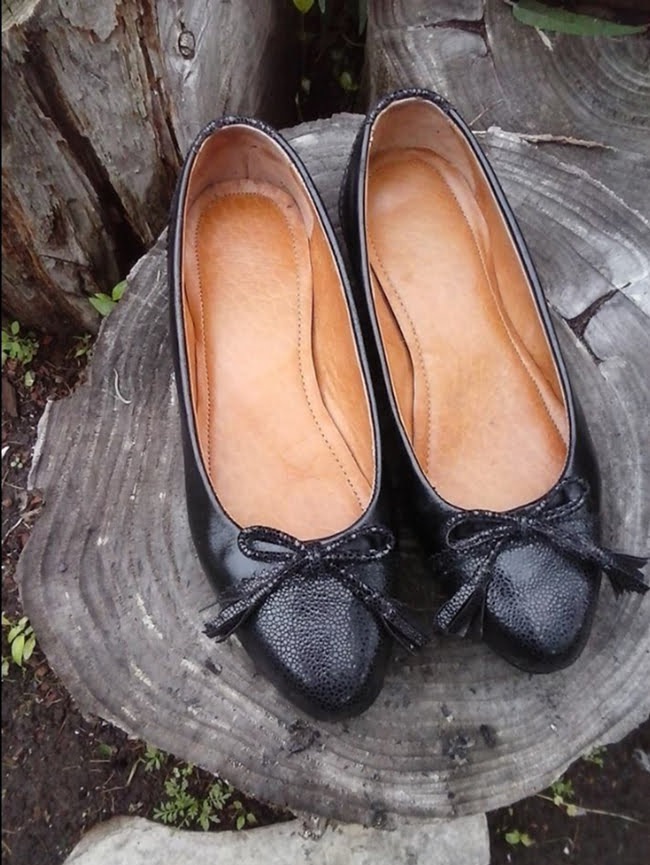
Let’s look at the examples. All these designs of flat ballet shoes were made by my students who were total beginners like you!
Here are some designs of flat ballets based on the classic one.



Beyond The Boundaries of The Classic Flats

The second approach is to work outside of the boundaries of classic flat ballet shoes. This approach will give you the possibility to make unlimited designs of flat ballet shoes.
The main concept of this approach is to use the pattern of your classic flat ballets and change it by adding different design elements outside the boundaries of classic shoes.
To add different shoe elements and change the pattern of your classic flat ballets you will need to know different rules beyond the classic pattern.
So these are the main steps:
- design on the shoe last your flat ballets
- use the rules of construction of classic flat ballet shoes
- change the pattern or add different outside elements
This approach is a part of my Footwear Design Course that I upgraded especially for you and included in my Flat Ballet shoe Program.
So after finishing this program, you will be able to make your own shoe designs and your possibilities are unlimited.
Now, I want to show you what possibilities you will have with this approach on the example of the works of some of my students [ BTW many of them already established their own shoe business!]


Now, to make everything clear and easier to understand, I made a shoemaking tutorial where I explain step by step the 3 most important things you need to know about making flat ballet shoes.
Making Flat Ballet Shoes [Unlimited designs]
So we talked about the few most important things in making flat ballet shoes but I want to go deeper with you and talk about other super important things that you, as beginners in shoemaking, must know.
I want to share with you :
Shoemaking tools and materials you need to make flat ballet shoes
The process of making flat ballet shoes ( the main steps)
The most common mistakes beginners make in making flat ballet shoes and solutions.
So let’s start with shoemaking tools and materials you should have in the process of making flat ballet shoes.
Shoemaking tools and materials you need to make flat ballet shoes
There are a lot of different shoemaking tools and materials you can work with but you can start learning shoemaking and making shoes only with this minimum set of shoemaking tools and materials
Tools you need for pattern making
1. Flat ballet shoes last. It is the pump shoe last with a heel height up to 2 cm.

2. Now, I already written about general tools for pattern making. So, for making flat ballet shoes you will need to have the same tools. That’s why I will not repeat it here, just make sure to check this post ‘’Shoemaking tools for pattern making’’
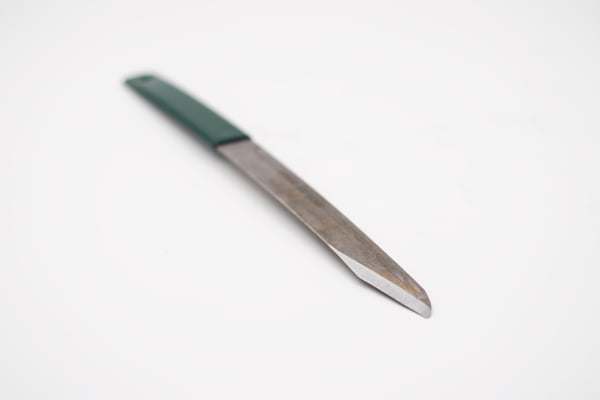
What I want you to remember is that a simple utility knife that you will find also in the list of shoemaking tools for shoe pattern making, is one of the most useful tools in making shoes.
I will talk more about it later. I will give you a tip on how to work with easier if you are a total beginner in making flat ballet shoes.
Shoemaking materials you need to make flat ballet shoes
1. For the upper, you can use different leather types but I advise you to work with full-grain baby calfskin or sheepskin with a thickness of 0.9 -1.1 mm
2. Use also full-grain skin for the lining. There few skin types you can use: calfskin, goatskin, sheepskin, pigskin with a thickness of 0.9 mm
I already made a tutorial about different leather types for beginners in making shoes, so check this post out ‘’Leather Types that beginners in shoemaking should avoid’’
3. Non-woven chemical fabric for the stiffeners
We use this material to make shoe stiffeners. To know how to work with this material in shoemaking, check this post ‘’How to work with celastic material in shoemaking?’’.
4. Cork

Cork is a great material and we use it a lot in making shoes. So, where we use it and how we use it in shoemaking, check it in this post ‘’Cork in shoe making’’.
5. Leather for the shoe soles and heels.
In my flat ballet course, I teach how to make shoe soles from veg-tanned leather because it is one of the guiltiest materials. Also, you can make heels for your flat ballet shoes by working with the same leather type.
I already wrote a post on how to make heels from veg-tanned leather, so check this post out ‘’How To Make Heels and Heel Height Calculation’’ .
6. Reinforcement tapes
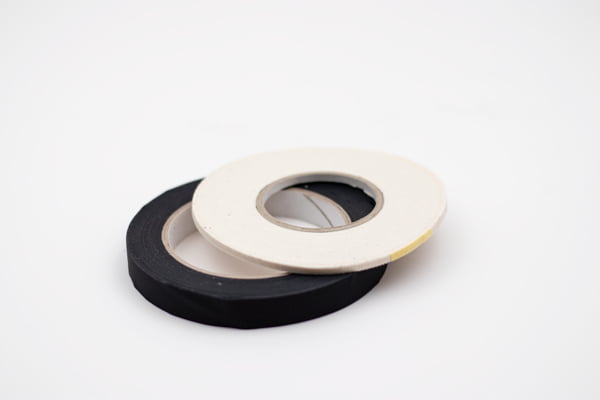
There are two reinforcement tapes. The narrow reinforcement tape 4mm for folding and the wide tape 14-16 mm for the back seam reinforcement.
If you want to know more about the process of folding and how to use the narrow reinforcement tape in your shoemaking craft, check these posts :
‘’How to Reinforce the Shoe Top-line in Shoemaking?!’’
‘’How To Fold a Shoe Upper?![Making of Shoes]’’
We use it in the entire process of making flat ballet shoes. It is contact glue for leather and it has a strong smell. So, for your safe work, ventilate your workplace well, and in general, use a mask and goggles.
Shoemaking tools
1. Silver pen

3. Shoemaking rasp or Dremel drill

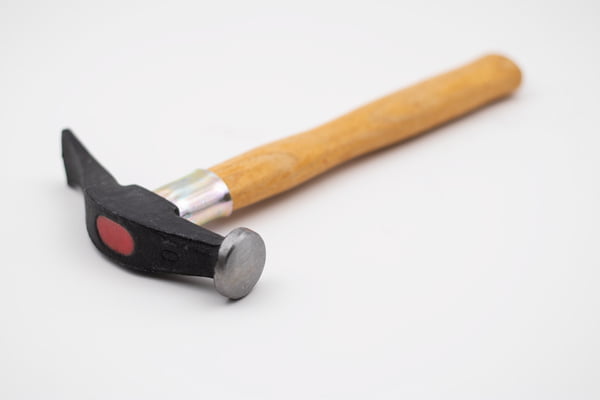
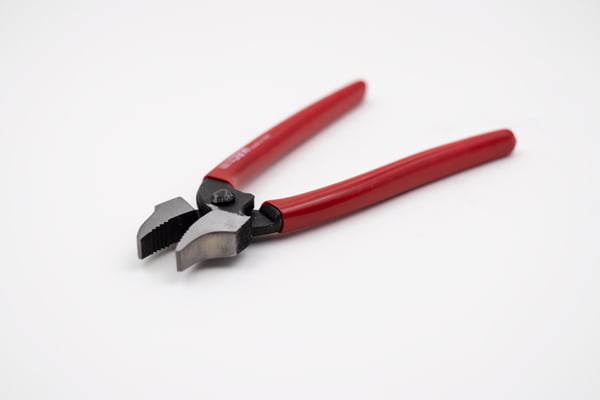
6. Shoemaking long nails and Shoemaking short nails

Now you can understand that you really don’t need to have all existing shoemaking tools to make your flat ballet shoes.
The process of making flat ballet shoes ( the main steps)
The process of making flat ballet shoes includes a lot of different steps and it is impossible to show everything in this format, so I decided to show you the main steps.
1. Apply the design of your flat ballet shoes on the shoe last
In this step of making flat ballet shoes, you need to draw the flat ballet shoe design on the shoe last previously covered with masking tape.
2. Make a Basic pattern of the flat ballet shoes.
If you want to know more about Basic Pattern in shoemaking check this post “Basic pattern is important”
3. You need to check the correctness of your basic pattern. We check basic patterns working with ordinary paper A 4.
Why we do it in pattern making, you can learn in this post “Save your money on leather, make shoes working with paper patterns [Video Tutorial]”
4. Making the upper and lining patterns of the flat ballet shoes.
5. Cutting/ Assembling/ Sewing
6. Making the insole for the flat ballet shoes
7. Lasting
8. Making a shoe sole
9. Making heels
10. Finishing and making the sock lining for the flat ballet shoes.
These are the main steps to make flat ballet shoes and each of them involves a lot of different processes, shoemaking techniques, and approaches. Now it is impossible to go through all these steps, so if you want to make flat ballet shoes, make sure to check out my Beginner Pro.
Now, although I can’t explain every small detail in making flat ballet shoes, I can share with you some very useful tips that you will be able to apply right now.
So, let’s talk about one of the simplest but very useful tools for a beginner in shoemaking, let’s talk about utility knife.
Shoemaking trick: How to work with a utility knife in shoemaking.
This knife is very easy to source and working with this knife you will do a lot of work while making flat ballet shoes: you will cut your masking tape patterns, cardboard patterns, leather for the upper and lining, leather for the soles, cardboard for the insoles.
So, you should know how to work with it correctly to not ruin your cardboard patterns, leather parts of the upper, etc.
Before you go to use it I advise you to train yourself a little bit. What you should do is draw on the cardboard lines with different shapes and cut them.
There is a small trick to cut these lines precisely:
You should look at the point on the line you will be cutting a little bit far away from the blade’s edge of the utility knife. Using this approach you can cut all kinds of shapes accurately, even straight lines without a ruler.


Try it, learn this approach, and only then you will cut all your shoe details accurately.
In the tutorial, I made for you (at the end of this post) I show how to cut working with a utility knife. Don’t forget to check this post “Simple Knife For Shoemaking Craft”, where I teach how to keep the blades of the utility knife sharp because it is one of the main conditions to work accurately and easily.
One of the Main mistakes beginner do in making flat ballet shoes and the solution to avoid this mistake
Yes, you will make a lot of mistakes and will have a lot of incorrections in making your first ever flat ballet shoes, and it is absolutely normal. During your learning you will correct them and will learn the right way, don’t worry.
This is how all my students have learned! To be inspired by the achievements of some of my students who were total beginners at shoemaking, at the beginning of their learning, you can check some works of some of my students here “Shoemaking Students Make Shoes”
So, from experience, I know that 99% of beginners in making fat ballet shoes will have not identical left and right halves of the pair, where one half will have too low a throat line than the second one.
That’s why let’s start with this mistake of making flat ballet shoes. I want to help you to resolve one of the most common problems beginners in shoemaking have.
During the lasting of your flat ballet shoes, you should make sure that you pull the upper of the flat ballet shoes identically in both halves, so the throat line of both halves will look the same!
It is very difficult for a beginner in making flat ballet shoes to know how to manage it.
That’s why I want to give the next shoemaking tip that will help you in lasting flat ballet shoes identically.
It starts in the step of pattern making of your flats ( Yes, pattern making is a key in shoemaking!)
Shoemaking tip on how to last identically both halves of the flat ballet shoes upper.
So let’s dive in.
Time needed: 15 minutes
Must do operation during pattern making of the flat ballet shoes
- After you will cut off the masking tape pattern of your flat ballet shoes, don’t take off the leftovers of the masking tape pattern. Leave them on the shoe last

- In the center of the shoe last, where you have the edge of the attached masking tape in the throat line, mark with the marker a point

- Take the measurement tape and place it between this point and the bottom edge of the shoe last in the toe.

- Measure this distance.

- Before you go to last your flat ballet shoe upper, measure the same distance and mark points on the second shoe last in the center. These two points in the throat line will help you to pull the upper of your flats identically in both halves, so you will have the same opening in the neckline in making flat ballet shoes.

Of course, before you make the real upper, you should check your flat ballet shoes from the leather you chose for the upper. In making this prototype you will see how it stretches. Maybe because of the lather quality you will need to change this point.
Now. I want to make more tutorials on different footwear models.
If there is a specific model (footwear type) you want to make/learn how to make.
Comment bellow


Hi Sveta….I am interested in your flat ballet shoe class starting soon. Could you give me the details please ?
Thank you
Margaret
Great, sent you an email
Your website and very good and very useful information Thanks again Madam,I am from India {South India State, Tamil Nadu